


Unlock AI for stunning 3D home design. Use Homestyler with furniture models for fast rendering. Elevate your home design with cloud rendering.
Designing your dream home used to require expensive desktop hardware and years of specialized CAD training. Today, modern web applications have completely transformed the interior design landscape. Homestyler stands at the very forefront of this revolution as a comprehensive, cloud-based 3D home design software platform. By combining an intuitive drag-and-drop interface with powerful AI tools, Homestyler allows interior designers, DIY homeowners, and real estate professionals to visualize space, create floor plans, and generate photorealistic 3D renders in minutes directly inside a web browser.
Whether you want to upload a floor plan sketch, experiment with branded 3D furniture models, or leverage an AI-powered interior rendering engine, this in-depth Homestyler review breaks down everything you need to know. We will examine how Homestyler uses generative artificial intelligence, explore its subscription options and free plan, analyze its hardware performance, and compare it against industry alternatives so you can decide if it is the right interior design tool for your workflow.
Disclaimer: I strongly believe in transparency. If you buy using the links on our site, we may earn a small commission without any extra cost to you. This helps me to keep producing honest reviews. Read More >>
Quick Verdict: Is Homestyler Right for You?
If you are looking for a powerful 3D design tool that bridges the gap between basic room planners and complex professional CAD software, Homestyler is one of the best free and accessible solutions available today. It excels at fast floor plan creation, real-time design visualization, and lightning-fast cloud rendering.
While traditional design software requires hours of setup and complex texture mapping, Homestyler offers a streamlined, all-in-one workspace. Its built-in AI software capabilities automatically transform flat 2D floor plans into immersive 3D view environments, making it exceptionally easy to bring your home design ideas to life.
What is Homestyler? Core Architecture & How It Works
To understand how Homestyler made high-end visual design accessible to millions, it helps to look at where the software started and how its technology functions under the hood.
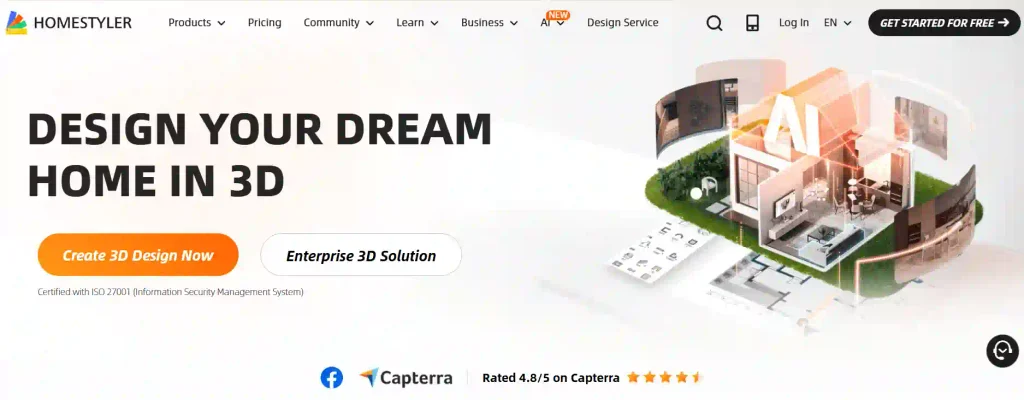
2D Floor Planning vs. Real-Time 3D Rendering
Homestyler originated back in 2009 as Autodesk Dragonfly, a simple web-based interior layout engine. Over the years, supported by a major joint investment from Easyhome and Alibaba Group in 2019, along with key technological collaborations with NVIDIA in 2025, it evolved into a sophisticated 3D home design engine driven by cloud computing. When you use Homestyler, you work simultaneously across 2D and 3D modes:
- 2D Mode: You sketch precise wall lengths, set room boundaries, adjust partition thickness, and position doors or windows.
- 3D Mode: The engine instantly extrudes those flat schematics into full spatial structures. You can switch to a live camera view, modify ceiling heights, apply wall moldings, and arrange 3D furniture models with precise snapping and alignment guides.
This dual architecture removes the friction from traditional spatial planning. You never have to manually build wall geometry or configure camera clipping planes from scratch because the application handles the underlying mathematics automatically.
Cloud Computing & WebGL Engine Performance
Unlike classic desktop interior design programs that require heavy graphics card installations, Homestyler relies on WebGL and cloud-side calculation servers. When you request a photorealistic render, your computer does not perform the heavy light-tracing processing locally. Instead, Homestyler sends the scene data to high-performance cloud servers, generating realistic 3D images in the cloud in a matter of seconds.
This architecture enables smooth performance across standard laptops, tablets, and desktop computers alike, making it easy to draft, edit, and render design projects from virtually anywhere.
Deep-Dive: Homestyler’s AI Feature Suite Evaluated
Generative artificial intelligence has fundamentally altered the design workflow. Instead of building every cabinet node or applying manual surface shaders, Homestyler allows users to leverage integrated AI tools that handle repetitive modeling and rendering tasks automatically.
AI Floorplan Generator (Hand-Drawn Sketch to 3D Model)
One of the most impressive features in the modern Homestyler toolkit is its image-recognition floor plan generator. Instead of spending an hour measuring and drawing walls manually from scratch, you can scan or photograph a paper sketch, blueprint, or architectural PDF and upload it directly into the platform.
The powerful AI analyzes the image, identifies wall lines, doors, and window openings, and converts the 2D file into an editable 3D structure in seconds. From there, you can adjust wall dimensions, reassign room labels, and begin decorating immediately.
AI Staging & Moodboard Tools
Struggling with color combinations or furniture layouts? Homestyler features an array of smart staging modules designed to speed up the creative process:
- AI Stager: Select a room type, such as a Japandi living room, Modern Minimalist bedroom, or Mid-Century dining area, and the system will automatically place complementary 3D products and decor items throughout the space.
- AI Moodboard & Painter: Upload reference inspiration images, and the AI will extract color palettes, suggesting matching wall paints, floor materials, and fabric textures directly from the Homestyler library.
- AI Texturer: Describe a custom material in natural language, for example, “polished green Venetian plaster with subtle gold veins,” and the engine generates a tileable 2D texture mapped directly onto your selected 3D surface.
AI Video Generation & Automated Camera Pathing
Producing client walkthrough videos used to require manual keyframing, complex pathing nodes, and lengthy local rendering queues. With Homestyler, generating a cinematic video tour takes just a few clicks. The AI Animator analyzes your room layout, automatically establishes camera height, prevents wall clipping, and generates smooth transitions through your 3D interior. The final video renders in the cloud, giving you a polished walkthrough ready to present to clients or share on social media.
Homestyler Pricing
Understanding how Homestyler is free versus how its paid subscriptions work is essential before committing to major interior design projects. The platform uses a tiered membership structure alongside a credit or coin system for rendering higher-resolution outputs and utilizing specialized AI features.
| Plan | Price (USD) | Key Inclusions & Limits |
| Basic (Free) | $0.00 | Unlimited 1K renders, basic assets, watermarked exports |
| Styler | $3.90/mo | Full model library, no watermarks, 80 AI credits |
| Pro | $4.90/mo | 75 x 2K/4K renders per month, 20 x 8K renders |
| Master | $9.90/mo | Unlimited 4K renders, 120 x 8K renders, collaboration tools |
| AI Boost | $4.90/mo | 1,500 monthly AI processing credits plus priority generation |
Free Tier Capabilities vs. Actual Limitations
Homestyler offers a free plan that is surprisingly capable for beginners and casual DIY creators. Out of the box, the free tier includes:
- Unlimited creation of 2D and 3D floor plans.
- Access to thousands of standard furniture models and materials.
- Unlimited standard-resolution (1K) cloud rendering.
However, the free plan has a few notable boundaries. Exported images carry a small Homestyler watermark, high-resolution renders (2K, 4K, and 8K) require point redemption or direct purchases, and access to premium branded 3D furniture models is restricted unless unlocked via standard design coins earned through platform engagement.
Pro vs. Master Subscription Breakdown
For professional interior designers and commercial users, upgrading to a paid tier removes watermarks and provides dedicated monthly rendering allocations:
- Styler Membership ($3.90/month): Best for enthusiasts who want full access to the complete model library, custom texture uploads, and watermark removal without needing mass quantities of ultra-HD renders.
- Pro Membership ($4.90/month): Ideal for practicing designers. Includes 75 high-resolution (2K or 4K) renders per month, 20 ultra-HD 8K renders, custom lighting adjustments, and priority rendering speeds.
- Master Membership ($9.90/month): Designed for active studios. Provides unlimited 4K renders, up to 120 8K or 12K panorama renders, custom business branding or logos on outputs, and advanced team sharing features.
- Master Membership ($9.90/month): Designed for active studios. Provides unlimited 4K renders, up to 120 8K or 12K panorama renders, custom business branding or logos on outputs, and advanced team sharing features.
The Math of Render Credits (1K to 8K & VR Tours)
If you run out of your monthly plan inclusions, you can buy extra render passes or AI credit packs à la carte:
- 2K High-Res Render: Approximately $0.99 per single render.
- 4K Ultra-HD Render: Approximately $1.99 per single render.
- 12K VR Panorama: Approximately $3.99 per single render, which creates a fully rotatable, 720-degree interactive tour viewable on mobile or VR headsets.
- AI Credit Packs: Available from $9.99 for 200 credits up to $49.99 for 2,000 credits, used for advanced AI texturing, generative modeling, and automated staging tasks.
Workflow Guide: From Blank Canvas to 4K Render
Ready to create your first design? Here is a simple, step-by-step workflow for building a complete space using Homestyler.
Step 1: Wall Construction & Ceiling Height Configuration
Start your project by opening the editor canvas. You can choose to start from scratch or upload a floor plan image as an underlying tracing guide.
- Select the Draw Wall tool to sketch out room perimeters in 2D mode.
- Click on any wall segment to precisely type in real-world measurements in feet, inches, or millimeters.
- Set global or room-specific ceiling heights, and insert doors, windows, or structural openings from the left-hand building catalog.
Step 2: Customizing Materials, Textures, and Lighting Nodes
Switch into 3D view mode to bring your structure to life.
- Open the Material Library and apply flooring options, such as hardwood, porcelain tile, or polished concrete, by dragging textures directly onto the floor plane.
- Use the paint tool or texture generator to treat wall surfaces.
- Open the Furniture Catalog to browse through thousands of real-world items, including sofas, tables, light fixtures, and decor. Use the intuitive drag-and-drop interface to place items, rotate them into position, and adjust their dimensions.
Step 3: Importing Custom 3D Models (.OBJ / .FBX)
If you need to incorporate bespoke furniture or client-specified items not available in the default library, Homestyler allows custom asset imports.
- Navigate to My Assets and click Upload Model.
- Select your file in a supported 3D format, such as .obj, .fbx, or .skp.
- Set the model scale, assign surface material shaders, and save the asset to your personal cloud library for seamless reuse across all your interior design projects.
Step 4: Configuring Ray-Tracing Renders & Post-Processing
Once your design layout is complete, click the Render button at the top of the interface to open the rendering studio.
- Set the Viewport Camera: Adjust field of view, camera height, and tilt angle to capture the best perspective of your room.
- Configure Lighting: Select environmental presets, such as Natural Daylight, Sunset, or Warm Interior Night, or manually add custom light nodes like spotlights, ambient fills, and LED strip accents.
- Choose Output Quality: Select your desired resolution, including 2K, 4K, or 8K Panorama.
- Execute Render: Click Submit. The cloud system will render your scene in the background, applying photorealistic light-bouncing, shadow diffusion, and material reflections automatically.
Technical & Hardware Performance Guide
Because Homestyler uses WebGL technology within your web browser, performance is closely tied to browser settings and available system memory.
| Hardware Component | Minimum Requirement | Recommended Specification |
| Operating System | Windows 10/11, macOS, ChromeOS | macOS or Windows 11 64-bit |
| Web Browser | Google Chrome, MS Edge, Safari | Google Chrome or Microsoft Edge (Latest) |
| System Memory | 8 GB RAM | 16 GB+ RAM |
| Graphics Card | Integrated Graphics (Intel HD) | Dedicated GPU (NVIDIA or AMD) |
| Network Speed | 10 Mbps Internet Connection | 50 Mbps+ Broadband Internet |
System & GPU Requirements for Smooth Browser Playback
While you do not need a high-end gaming PC to run the platform, keeping your browser optimized ensures a smooth experience when working with complex scenes:
- Turn On Hardware Acceleration: In Google Chrome or Microsoft Edge, go to Settings > System and ensure “Use hardware acceleration when available” is toggled ON.
- Manage WebGL Context: If you notice viewport lagging while navigating in 3D, navigate to chrome://gpu to confirm that WebGL 2.0 is running with full hardware acceleration on your graphics processing unit.
How to Prevent WebGL Crashes on Large Scale Projects
Working on an extensive multi-floor home with hundreds of detailed furniture assets can occasionally push browser memory to its limits. To keep your session running smoothly without unexpected tab crashes:
- Hide Unused Layers: Toggle off visibility for room contents or upper floors when focusing on a specific zone.
- Optimize Custom Imports: Keep imported .obj or .fbx assets under 50,000 polygons whenever possible.
- Clear Browser Cache Periodically: Clearing cached web data prevents temporary file clutter from clogging system memory during long design sessions.
Homestyler vs. The Competition
How does this platform stack up against other popular choices on the market? Let us compare Homestyler directly with its top alternatives.
| Platform | Learning Curve | Native AI Tools | Render Speed | Target User |
| Homestyler | Low/Beginner | | Fast (Cloud) | All-Rounder Designers |
| Planner 5D | Very Low | Moderate | Moderate | Casual DIY Homeowners |
| Foyr Neo | Moderate | Moderate | Very Fast | Professional Designers |
Homestyler vs. Planner 5D
Planner 5D is another popular browser-based layout planner tailored heavily toward casual home renovators. While Planner 5D is very easy to pick up, Homestyler offers significantly higher render realism, a vastly superior selection of real-world 3D furniture, and a much deeper suite of AI-powered tools for professional visual production.
Homestyler vs. Foyr Neo
Foyr Neo is built primarily for commercial interior designers and carries a considerably higher subscription price tag. Foyr Neo delivers exceptional workflow efficiency for commercial space planning. Still, Homestyler is designed to be far more versatile by providing a lower barrier to entry, a generous free plan, and intuitive mobile app synchronization across devices.
Frequently Asked Questions
Is Homestyler free to use?
Yes, Homestyler is free to use. The basic plan allows you to create unlimited floor plans, access a comprehensive catalog of 3D models and textures, and generate unlimited standard 1K resolution cloud renders without entering a credit card.
How do AI Credits work in Homestyler?
AI Credits are used to power generative artificial intelligence tools on the platform, such as converting 2D floor plan photos into 3D models, generating custom PBR textures from text prompts, and executing automated room staging presets. Free accounts include starter credits, while paid plans provide additional monthly credit allocations.
Can I remove the Homestyler watermark from my renders?
Yes. Watermarks are automatically removed when you subscribe to any of the paid tiers, such as Styler, Pro, or Master, or when you purchase individual high-resolution render credits à la carte.
Can I use Homestyler on my iPad or mobile phone?
Yes! Homestyler offers dedicated iOS and Android apps that sync seamlessly with your cloud account. You can draft plans on your computer, refine furniture arrangements on your tablet, and present 3D walkthroughs on your phone.